
Installing a battery in a wireless mouse. How to choose batteries for a wireless mouse Years of weak batteries in a wireless mouse

Most models of wireless mice use batteries and accumulators of size R03 (little finger, also known as AAA). Mice using the AA form factor (finger elements) are much less common. But the principle for choosing batteries of both sizes is the same. Lithium batteries in AAA and AA formats do not exist in nature.
Step 2
Nickel-cadmium batteries (NiCd). This type of power supply has a resource of about 1000 charge cycles. It is resistant to cold, short circuits and charges quite quickly. The advantages of this type of battery include adequate cost and a fairly decent shelf life. The main drawback is the notorious “memory effect,” a condition in which the battery loses capacity by remembering the previous incomplete discharge. To avoid this, NiCd batteries should only be charged after they are completely discharged.
Step 3
Nickel-metal hydride batteries (Ni-MH). This type of power supply has replaced the nickel-cadmium batteries described above. Unlike NiCd, Ni-MH batteries have virtually no “memory effect” and also have increased capacity. It is recommended to store charged Ni-MH batteries (outside devices) in the refrigerator. This type of battery can now be found on sale; prices start at 5 USD. for one piece.
Step 4
Charging device. The downside to mice with AA batteries is that you have to purchase a separate charger. Price chargers from 5 USD Among the battery manufacturers, Ansmann, Panasonic and Duracell have proven themselves well. But be careful, in stores and markets there are a lot of counterfeits of these companies; you can distinguish them at a low price. Do not be fooled by the low price of the battery - it may well turn out to be branded, but with a low capacity.
- The battery voltage is 1.2V, so not all mice will run on batteries.
- It is better to buy batteries with higher capacity; the operating time of the mouse will increase significantly.
A wireless mouse is a very convenient thing and many people choose it. But, it has one very significant drawback. You have to change the battery every month, that's a fact. Some elements are not able to survive until the end of this period.
The conclusion from this is that if you want to save money, never buy a wireless mouse. Well, for those who have already bought it, we’ll tell you which mouse battery is better and will last longer.
What is the best mouse battery?
The best one is the one that can work for a long time. The user has the following choices:
- Buy a new battery every month or every 2-3 weeks. Expense is about 50 rubles per month.
- Take the battery cell required voltage, high capacity and to it. Costs 2000 rub. Enough for more than 1 year. If it works for more than 3 years, the costs will be fully recouped. You can find a battery with USB recharging, then you can save on the charger.
According to people, the best batteries for a mouse are:


But unfortunately, in our time no one is safe from fakes. As you know, a well-promoted brand is often counterfeited. Therefore, by purchasing the above batteries, the chance of stumbling upon a bad product is reduced.
The types of batteries for a mouse can be as follows:
- Rechargeable.
1.5 volt battery and 1875mAh

How long does the battery last in a wireless mouse?
Life time depends on the type. If it is a regular salt or alkaline battery, it will last for 2-4 weeks. Using a battery allows you to increase the time battery life up to 1 month. After charging, it will be able to work for the same period. Typically the battery lasts for several years. The main thing is to buy a good charger with a display for the battery.
How to insert batteries into a wireless mouse correctly?
The process is quite simple. Before replacing, turn off the device!
Required:
- Mouse.
- New battery.
- Sharp nails 😊
- Possibly a screwdriver. It is needed if the compartment is fastened with a screw. Or you need to pry off energy sources to pull them out.
Turn over computer mouse on the back. Place the battery compartment towards you.
Unscrew the bolt that holds the cover, if there is one. Or use gentle pressure to slide the holder latch.
Remove the old mouse batteries and replace them with new ones.

Observe strictly. That is, put plus to plus, and minus to minus. It will be right!
Most often, you only need one battery for your mouse, so everything should go smoothly. After the battery is installed, check if the device works. If everything is fine, then close the lid and enjoy!
The check should be performed before closing the compartment. This saves time on opening and closing the cover in case of battery failure.
Video on how to replace batteries in Apple Magic Mouse?
What to do if the battery in the mouse does not work?
If the battery has served its life and shows no signs of life, it should be replaced with a new one. To do this, go to a retail outlet or place an order in an online store. How to change the battery in a mouse if it is dead was described in the section above.
— the mouse is powered by its own built-in battery, which is not of standard sizes and, as a rule, non-removable. Unlike replaceable batteries, such a battery does not need to be purchased separately - it comes with the mouse, so the device is ready to work out of the box. And while working, you don’t need to spend money on buying batteries - it’s enough to charge the device from time to time. True, charging takes time and requires a power source; however, many rechargeable mice can be charged from a regular USB port while in use. The clear disadvantage of batteries, compared to replaceable batteries, is their relatively low autonomy: in the most “long-lasting” models it does not exceed 120 days, while many battery-powered mice can work for six months or even longer (in individual devices- up to three years). Besides, this type nutrition significantly affects the price of the “rodent”.Replace only with a similar battery. Make sure that the dimensions of the new energy source match the old one. Also pay attention to the voltage, it should be identical to the low voltage. Information about this is written on the case.
Hi all. I’ll start right away with the matter, I have a wireless computer mouse and lately it’s been eating up the batteries too much. On the mouse itself it is written that the current consumption is 15 mA, I measured it - it really is 15 mA. But even with a 1900 mAh Ni-Mn battery, it lasted just over a week. At first nothing, then again I didn’t understand anything... It began to seriously stress me out, not because I was sorry for the money for batteries, but because it was too much to change them every time. I decided to install a battery from the phone, the capacity was larger, and the voltage was higher, in any case it would last for a longer time, but that was not the case, the mouse flatly refused to work with the battery. I already thought that I had burned it, but when I installed the battery, the mouse came to life... Having scoured the Internet, I did not find any acceptable solution to this problem with a very consuming mouse. I decided to solve the problem myself, it’s not good to change the batteries every 2-3 days.

I started looking for an alternative to batteries. There weren’t many options - make a mat with inductive current transmission, then the mouse would be powered by the mat, but then extra wires appeared and the mouse became not completely wireless, or install a more capacious battery. I decided to use the battery. And a 3.7V Li-Po battery from an MP3 player had been hanging on the table for a couple of weeks. Unfortunately, I don’t know the capacity (I found what kind of MP3 this battery was from - it says the operating time is 8 hours), it fit perfectly in size and held a charge well. Taking into account my early experience of connecting 3.7 V to a mouse, I began to think about how to make a 1 - 1.5 V stabilizer.

Here the almighty Internet helped and gave me a stabilizer circuit for . Good enough option for me. Compact and just capable of stabilizing the voltage at 1.2 V. Fortunately, there was one LM available, it was immediately found and checked for serviceability. And indeed it stabilized the voltage at 1.23 V. Ideal.

However, there is one “BUT”, no matter how good the stabilizer is, it will still take on the current, even if there is no load connected to it. And in my case, every extra µA will negatively affect the duration of the mouse. I started thinking about how to make this stabilizer turn off automatically when the mouse is not in use. Then I remembered that somewhere on our website there was an article about automatic shutdown multimeter. , the scheme turned out to be as simple as two fingers. A symbiosis of the two schemes was immediately created.
Scheme

I used KP501 as a transistor, if you are going to power the mouse from 3.7 volts or lower, then you need to look in the datasheet for the opening voltage of the field switch: any will NOT WORK. If the opening voltage is below 3.7 V, then the field-effect transistor will either not open at all, or will open slightly and there will be large losses at the under-opened junction of the transistor. I started building the board, the main criterion was compactness, and only then beauty and aesthetics. I spread the board, etched it, drilled it and started assembling it.
The only thing I want to say is that in order not to kill the transistor during soldering, it is advisable to wrap all its legs with wire (without varnish, electrically conductive). There is a sad experience when the bolt of a field worker was killed by static (if the bolt is heavy enough, a few nF can be done without tying the legs).
Regarding the operating time - the greater the capacitance of the capacitor on the gate-source and the greater the resistance of the resistor parallel to the capacitor, the longer our stabilizer and mouse will be turned on. My time was exactly 1 minute. Just for fun, I checked it several times with a stopwatch - 1 minute exactly)) In my opinion, you can make even the simplest countdown timer this way.

So the board is ready for integration into the mouse. I didn’t even try to solder, everything was done in a hurry, as they say, the main thing is that it works.

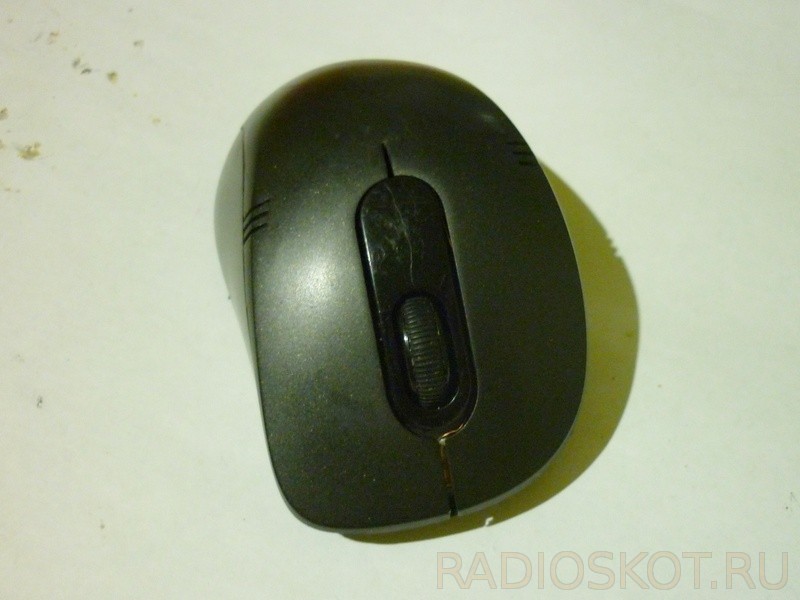
Let's disassemble the mouse.


Now we need to add our own button to launch the stabilizer and therefore the mouse itself. I couldn’t think of anything better than gluing improvised copper plates as button contacts. Wires were soldered to them and passed through the holes.


The plastic that presses the buttons on the board has returned to its rightful place. I checked with a multimeter whether there was contact when pressed and began to assemble further. I soldered the auto-of board with a stabilizer, fixed it with glue and sealed it with electrical tape (it must be sealed with blue electrical tape, otherwise it won’t work!).

I placed the battery inside, brought out more wiring for charging (I hope they won’t be needed soon) and put the mouse back together, fortunately there was more space in my mouse than I expected, and everything fit in without difficulty. I didn't even have to change the design of the mouse itself. To launch the mouse, you need to press the left or right button. The mouse will start up for exactly a minute; if you don’t press any buttons for a minute, it turns off.

In the end, it turned out pretty good, if the battery runs out completely and there is nowhere to charge it (there is no time), then you can always insert a regular battery and continue working, this small device will not conflict with the battery.

I measured the current consumption from the battery - 18 mA, in my opinion not very bad, 2 μA is taken over by the stabilizer. The current when the “timer went out” was zero, which made me happy. I hope now the mouse will last for a long time.
During the writing of this article, the mouse behaved stably, without glitches. Perhaps someday I’ll make another induction mat/stand to leave the mouse there for charging. Especially for the Radio Schemes website - Denis.
Discuss the article INSTALLING A BATTERY IN A WIRELESS MOUSE
Salt batteries. Sometimes they are also called carbon-zinc batteries, as well as “dry” batteries. The simplest and cheapest type of disposable batteries. They consist of a zinc glass (-) and a carbon rod (+), and ammonium chloride is mainly used as an electrolyte. This type of battery has a low capacity of about 600 - 1000mA, and is prone to leaking sometimes, causing corrosion of the device in which it is installed. Highly not recommended for use in wireless mice. This battery will last for a maximum of a week of mouse operation. Cost from 0.25 USD
Step 2
Alkaline batteries (their subtype is “alkaline”, marking – LR). They are called that because they use alkali as an electrolyte. They have a large capacity of about 1700 - 2500 mA, they rarely leak, because the electrolyte is in a thickened state. Their advantages are low self-discharge current and can withstand a wider temperature range. Disadvantages: high mercury content, price several times higher than that of salt batteries. On such batteries, the mouse operates on average from 2 weeks to 3 months, depending on the type of mouse and the quality of the batteries. A good option for mice is Duracell Turbo LR03. Cost from 1.5 USD
Step 3
Lithium batteries. Versions with a voltage of 1.5V (AAA - pinky and AA - finger) are made from lithium copper oxide. This is the most advanced type of battery of all those described above. Designated FR. Not to be confused with lithium batteries, charging lithium batteries is dangerous! They have a capacity higher than alkaline batteries and do not contain mercury. Lasts 7 times longer than alkaline batteries. The big disadvantage is the price, sometimes reaching the cost of good batteries. Cost from 8 USD Of course, lithium batteries are the most durable, but unfortunately not everyone can afford them.
- You should not purchase alkaline and lithium batteries at markets, trays, etc. - there they can easily sell you expired goods that have lost their capacity.
- Most mice use the pinky form factor (AAA, R3, R03) batteries.
- Turn off your mouse when you are not using it, for example at night.
Publications on the topic
-
 Add to favorites Script to add to favorites for all browsers
Starting today I will tell you about one useful function on the site - this is a link, well, or a button “Add to bookmarks (favorites)”. This feature...
-
 How to remove non-reciprocal readers (followers) on Twitter Who are unfollowers
Twitter is becoming more and more integrated into modern life. Not only is the service very interesting, but its use...