
How to superimpose one image onto another. Cutting out an image in Photoshop and overlaying it on another

How to combine two photos or paste a cut out part of one image into another is a simple task for anyone who is a little familiar with Photoshop. But, firstly, not everyone knows how to work in Adobe Photoshop, and secondly, even experienced users do not always know how to superimpose one image onto another well. Let's look at several options for combining several pictures into one image.
In this example, small images are superimposed entirely as they are on a larger image that serves as the background. Each small picture is located in a separate layer and partially overlaps the layers below.
How it's done? You need to open all the necessary photos in Photoshop. Depending on the version of Photoshop, you will see several windows with pictures in the program window, several tabs, or at the top of the window next to the menu there is such a button with an opening menu.

In the menu, select a button with an image of 2, 3, 4 horizontal or vertical windows and immediately see the number of pictures you selected.

The images are completely overlaid, so go to the window with the small photo that you will overlay first on the background. In the layers panel you see only one background layer with this picture. Using the mouse, drag this layer into another window onto the image with the background. Click on the image with the background, it becomes active, and in the layers panel you already see two layers - the background and above it a layer with a small picture. In the same way, drag other pictures onto the background layer and arrange them in the desired order.
What should I do if the image I'm inserting is too big or too small? You need to increase or decrease it. To do this, click on the layer with the inserted image, select Edit from the menu > Free Transform, or press CTRL+T and drag the handles or rotate the inserted image.

Inserting a fragment from another picture into an image
Much more often you need to cut out only part of one photo and superimpose this fragment on another photo. Such compositions from parts of different images are called photomontage or photo collage.
Open the image from which you will cut, select the required fragment with any suitable selection tool, copy Edit > Copy, then go to the main document and paste the copied part of the image Edit > Paste. The inserted fragment is located in a separate layer and its dimensions can be changed as you need.


The main difficulty in this case is to qualitatively select the desired part from the picture. To avoid problems with selection, images from clipart collections are often used - pictures on a transparent background, or isolates - objects on a white or black background. A homogeneous background can be easily selected with a magic wand and removed.
Don't forget that the photo montage should look realistic, so follow
Smooth transition from one image to another
In some cases, you need to make one image smoothly transition into another, or some part of the picture becomes transparent, and the background is visible through it.
To overlay one image on top of another in Photoshop, open both original photos and drag a layer from one open image to another document. The top layer is made translucent (in the Layers panel, the Opacity parameter is reduced to 50-60%) so that the bottom layer can be seen through it, and the image is moved on each layer so that the parts of your future creation fit well together.
If you need to do it quickly and do not require high quality, you can use a soft eraser - the Eraser tool to quickly erase part of the layer. The Brush tool sets the size, shape, density, and hardness of the elastic band, so in the brush settings, the Hardness parameter must be set to 0, and in the brush parameters panel, Opacity (Opacity) must be set to 20-30%.

Use an eraser to erase parts of the top image in the right places and, when finished, return the Opacity parameter to 100% for this layer. The layer will become opaque, but those places where the rubber band has been applied will be completely or partially transparent.
If you need good quality, it is better to use a layer mask. Unlike an eraser, a mask does not change the main image, but only hides some parts of it. The mask can be disabled or removed without any damage to the main photo.
To add a mask, go to the layer with the top image and at the bottom of the Layers panel, click the Add Leyer Mask button.

In Photoshop's Toolbar, set the colors to black and white (foreground and background). Select the gradient tool, in the gradient settings set the transition from black to white. Click on the mask to make it active and create a gradient transition in the area where your images overlap. The edge of the top image will become transparent. Toward the middle, the transparency will decrease.
To add realism to the image, select a soft brush, make sure the mask is active and add black and white areas to the mask. Remember that in a mask you should paint black where you want to hide part of the layer, and white where you want to open some area.

Finally, two simple ways to smoothly transition an image into the background.
1 way. Place the image on top of the background and add a mask to this layer. In this example, the mask is created using a gradient radial fill. It is important that the mask completely hides the edges of the picture, then the transition from the image to the background will not be visible.


Method 2. Select the desired area in the image, execute the menu command Select > Modify > Feather. In the window that opens, you need to set the width of the feathering area in the Feather field. This value depends on the size of the image and is selected for each photo separately - experiment!

After that, copy the selected shaded area and paste it onto a suitable background. The edges of the inserted fragment will be translucent, with greater transparency near the edge.

If you want to make a new avatar for your social network account or insert a picture into a picture for a photo collage, then you can use one of the popular image processing programs or an online service on the Internet. Online services are special resources that allow you to insert one image into another directly in the browser and perform other operations with pictures and photos.
Services that allow you to insert a photo into an image
On such sites you can make a billboard with your photo, insert the photo into a frame or into the proposed templates. To do this, you just need to upload the desired photo, indicating the path to it on your computer. Next, select the image on which you want to superimpose your photo, adjust it a little and that’s it - the collage is ready. Here are a couple of such services:
- avazun.ru - the site presents many frames and background images on various topics, a separate section for creating an avatar for Vkontakte;
- effectfree.ru - a variety of options with billboards and frames, separate sections are devoted to creating covers for DVDs and calendars with your photo.
Online graphic editors
These services have almost all the basic tools of image editing programs. In addition, the advantage of online editors over offline editors is that you can work with your images from any computer. And in most cases, it is also possible to save your work on the server. Here's how you can combine two pictures using the example of the graphic editor of the resource pixlr.com:
Using Paint
But, if you do not have access to the Internet, you can use graphic editors installed on your computer to insert a picture into another picture. Let's look at how this can be done using Paint as an example. This editor is already installed on your computer; it is standard for Windows.
- Launch Paint, click File -> Open in the menu bar and select the picture that will serve as the background.
- Right-click and select Insert from file... from the drop-down menu (or Edit -> Insert from file...). In the window that opens, look for the second image, which will be placed on top of the background one.
- Immediately after inserting, adjust the position and size of the top image by pulling the corner or side of the image.
If you still have questions, watch the detailed video:
We use Adobe Photoshop
Another of the most famous graphic editors is Adobe Photoshop. Its functionality is much wider than that of Paint. Inserting a picture in Photoshop is a little more complicated than in Paint, but this video tutorial will help you figure it out:
A set of photomontage tools to choose from
Fotor is a powerful online photo editor and graphic design tool. It provides a huge database of online photo montage templates, backgrounds, and clipart to help you create amazing photo montages. Various stylish photo montage templates also give you the opportunity to create your own stunning photo montage online. Hundreds of custom cliparts allow you to perfectly decorate your photo montage image. Try Fotor's Photo Montage Software now!
Add expressiveness to your images with customizable photo montages
Photo editing is a unique way to make your images much more meaningful and help you get more attention on any social network. Fotor will do you a big favor by allowing you to create and edit your own photo montages online for free. Remove backgrounds from images using Fotor's background remover, change backgrounds, and add stickers that include different shapes. Afterwards, you can adjust their size and add other images to the forms. This will make your photo worth a thousand words.
Mount your designs
Feel free to get much more inspiration from photo montage. Use your imagination to the fullest and create your stunning visual creations with the help of Fotor's design creator, a set of backgrounds or background patterns can serve as the backdrop of your photo montage. You can also add more images and stickers to the background. Fotor can help you create stunning posters, flyers and increase product sales quickly.
The program created by PHOTO STREET specialists allows you to montage your face online for free. You just need to select one of the templates, special effects or tools available in the program and apply it to edit your photo. You can also apply all kinds of frames and other effects to any photo that can significantly improve the quality of the photo.
It should be noted that face photomontage online is absolutely free and without the need to study any popular graphic products. Absolutely any action performed through such an online editing program on the Internet makes the process of photomontage free and accessible to many users. The quality of the resulting photograph, it must be mentioned, is also at the highest level.
Advantages of an online photo editor
Free photo editing carried out online through our website is not only high-quality, but also very fast. All you need to do to start editing is just three simple steps:
- Select the necessary special effects from the online editing service;
- Upload the photo you need for editing from your computer or other source;
- Select the most optimal effect online and save the photo;
Once the edited photo is ready, the online editing program allows you to do almost anything with it - send it to your own gallery, save it on your computer, and also add it to friends. Thanks to the huge variety of modern functionality, as well as ease of use, the free online photo editor from PHOTO STREET is very easy to use and allows you to quickly and efficiently change photos.
The variety of effects available on the portal allows you to create almost anything with a photo. The main thing is to know what exactly you want to get in the end. Afterwards, you can admire the photographs obtained through the use of the service for no reason and with great pleasure. This is a very fast and practical way to obtain photographs, which does not require the presence of various types of programs and special skills.
10 votesWelcome to the pages of my blog. Today I will tell you a few secrets. It's a rare case in design when someone creates something. Everything has already been done and invented. All you have to do is enjoy the benefits of civilization. I'll show you the best way to create collages of unearthly beauty.
Well, if you want to superimpose a picture on a picture and use your creativity, then I have a little advice for that too. Let's not beat around the bush for too long. Let's start right now.
The best way for beginners
Any beginning designer wants to create, to create something of his own. This is quite logical and understandable. It is to realize their own potential that people go into creativity. Although, to be honest, this is not quite the right approach to the matter.
When a novice cook tries to come up with his own recipe, in most cases the result is not tasty. We understand well that first we need to practice on something that someone has already created for us. You can find a million options on the Internet with varying degrees of complexity, number of ingredients, and so on.

With design, in a good way, everything is exactly the same. The first method of creating your own collage is ideal for beginners. This online service will help you understand the structure of the image, but will also leave some room for imagination. Its advantage is that it is quite difficult to mess up. I'm talking about the site now ru.photofacefun.com .
There are a lot of tools here for beginners or those who are not going to delve into this process at all, but just want to superimpose one picture on another. I already talked about it when we did it.
Here you can also add a beautiful frame, using several editors to enhance the quality of the photo or give it a unique chic, as well as to a template or add animation. All this is free, which gives the service a special charm.
Now we are not interested in all this. Go to the site and immediately go to the “Tools” section and find a collage in the list.

The last of the proposed tools is collage. Let's choose him.

In the Layout section (layout, template) you can choose the method for arranging pictures. Depending on their quantity.

When you hover over any of the squares, a blue cross appears on it. Click and add an illustration from files on your computer.

Using the Spacing settings, you determine the width of the frame around the picture. Color determines its hue. To work with color, I suggest using the service at first Color Scheme . He will help you choose the most profitable combinations.

Roundness – rounding of rectangular shapes. It will help make the object streamlined.

With a setting like Proportions, everything is clear. It determines the width and height of the image.

There can be many options. The advantage of this service is that you don’t need to think about how to do it beautifully. You use the existing templates and that’s it.

Schemes of color combinations will help for improvement.
Online Photoshop – complex and not very
You can easily and simply overlay a picture on a picture in Photoshop (). I have already talked about working with the program, you can read about it. Today we’ll just work in the online version of this program. The application is also available on ru.photofacefun.com , and on the official website Pixlr.com . Please note that if you use the first option, you need to go to the “Editor” section and select this version. Others are not suitable for creating a collage.
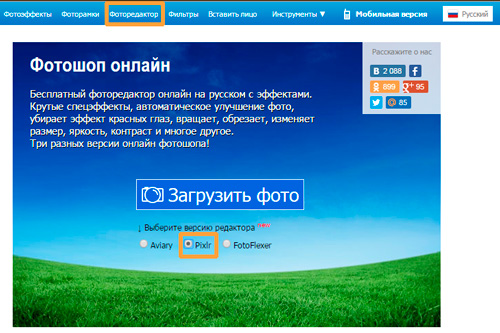
This is what the official website looks like. In this case, you will need an Editor. By the way, you can also download the result for free and without watermarks.

Publications on the topic
-
 Types of USB connectors - main differences and features
Contents: In our age of computer technology, smartphones and gadgets, it is difficult to find a person who does not know what connectors are...
-
 How to change a hard drive to an SSD
When replacing HDD with SSD, what increase in performance speed can you expect? This article tests using an example model...